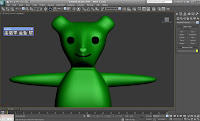

It got to the stage where I preferred one half of the model than the other. This was due to the fact that I was creating this free hand. In order to correct this, I deleted the half that I did not like and used the symmetry modifier, which made it easier to model since I only had to edit one side of the model.
For the nose I use the same method as the body and the head and attached it to the character. The eyes were created using spheres and adjusting the hemisphere to 0.15 to create the pupil. I copied the eye and adjusting the hemisphere to 0.5 to create the eyelids.
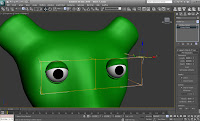
I placed an FFD box around the eyes to make them deformable for animation. I then attached them to the body by using the select and link tool this enabled me to continue to edit the eyes when animating them.
I placed an FFD box around the eyes to make them deformable for animation. I then attached them to the body by using the select and link tool this enabled me to continue to edit the eyes when animating them.
Using a cylinder I made a mouth shape then made copies, with the intention of keeping the mouth the same size. I was then able to edit them in different shapes for the expression I needed for my animation and linked them to the model using the ‘select and link tool’ and going in to object properties I made the visibility to 0 so when it come to animating I could make the mouth visible when needed and invisible when not needed for the right expressions.